This Parisian style two tier gift box cake was a delight to make and is perfect for any girly birthday do.
Showing posts with label fondant. Show all posts
Showing posts with label fondant. Show all posts
Thursday, 29 August 2013
Les Cadeaux
Labels:
black,
bow,
butterfly cakes bradford,
cake,
fondant,
french style,
gift box,
pink,
polka dot,
sugar paste,
two tier,
vanilla buttercream,
victoria sponge,
white,
wired hearts
Thursday, 27 June 2013
Mughal Garden Mini Cakes
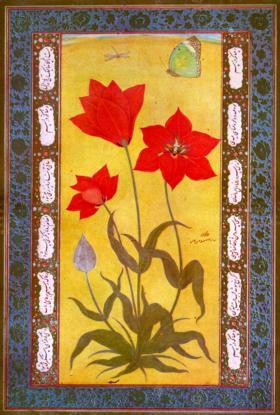
Mughal Art has always been a fascination for me. Especially since I have a little Mughal heritage myself. This, and the fact that I wanted to create something unique for Eid inspired me to design and create the 'Mughal Garden Collection'.
There is something very appealing about smaller versions of things and it works for cakes too. Although making mini cakes is probably more of an effort (and time consuming) the outcome is always better I feel. So here is my mini cakes collection designed for the occasion of Eid...
Mosaic Art Mini Cake
As the colours are quite vibrant and 'Indian' I feel they would also make great show pieces on wedding related functions, such as Henna nights....
The Paisley Mini Cake
The Mughal Garden wedding collection
Mughal Garden Bird-Cage
Mughal Garden Lily
Wednesday, 10 April 2013
Tuesday, 9 April 2013
Something Blue...
A luxury three tier wedding cake for that special 'something blue'.
Here's how the sugar roses blossomed for this cake....
 |
| Starting life as buds |
 |
| The very first petal |
 |
| Second row of petals |
 |
| Third row... |
 |
| Completed roses... |
 |
| The icing on the cake! |
 |
| Blue blossoms and signature butterflies |
Labels:
blossoms,
blue,
buttercream,
cascading roses,
fondant,
ribbon,
signature butterflies,
three tier wedding cake,
victoria sponge,
white
Saturday, 9 March 2013
Garden Liles
Here is a cake inspired by the spring. Understated yet effective, this cake would be ideal for weddings, as part of a cupcake tower or for any birthday lady.
Hand made sugar lilies
Rad velvet cake with cream cheese frosting. Absolutely luscious!
For more information visit www.facebook.com/butterflycakesbradford
Sunday, 24 February 2013
Mercedes Benz Cake Tutorial
This Mercedes Benz E-Class Cake was made out of a 10 inch square mud cake which was cut into half and placed one piece on top of another. I then carved the side profile of the cake (with a serrated knife) using a printed image of the car which was held up against the cake.
I made sure the width of the car was proportional to the length by measuring the maximum width of the car from the printed images and trimming the excess straight down.
I then carved the roof of the car which was slightly narrower than the base of the car at a slight tilt until I reached the bottom of the window level. I also cut out the tires with a circle cutter.
Next I cut the entire cake into three vertical sections (which I admit made me nervous) and filled with white chocolate ganache. I then covered the whole cake as neatly as possible with which chocolate ganache using a pallet knife.
I then let the ganache set and smoothed again with a palet knife dampened with warm boiled water. This was so that the fondant had something to stick to.
I then rolled out some light grey fondant (tinted using edible black gell colour) to about 1/4 inch thickness and covered the cake, smoothing the corners first (with the palm of my hands) before the rest of the car. I then slit into the tire areas and tucked excess fondant into cake.
I then trimmed the excess fondant with a butter knife and smoothed over the surface of the cake with a cake smoother.
Then I spray painted the car with silver edible lustre spray and began to mark out the details of the car using a dresden tool.
(Back details impressed using photo images of car...)
I then used edible black gell colour diluted with a little cool boiled water to paint around the bottom of the car cake to give it a 'raised' impression.
I then painted on details of the grill and the front bumper
I made tires and side lights out of fondant mixed with a little Tylo powder. I used the tire of a toy car to make the impression (this was thoroughly cleaned beforehand with detergent and detol!) and then cut around these using a circle cutter. These were painted with the same black gell and liquid edible silver lustre for the rims. I allowed these to dry overnight so that they were firm. The side lights were shaped with my fingers into rounded triangular shapes.
I then attached the side lights using a little piece of dry spagetti strand inserted into each of them and inserted these into the car with some edible glue to help them stick. I also painted the windows with edible clack gell mixed with a little cool boiled water and once this had dried went over them with confectioners glaze.
I made front/back number plates and head/back lights using fondant rolled out and cut to shape with an craft knife and attached to cake using edible glue. The details were completed with various colour edible ink pens/gells.
Last but not least the all important Mercedes Benz logo! This was done by piping royal icing (mixed with a litlle black gell and silver edible lustre) free hand onto grease proof paper (allow to dry for a few hours at least) and slowly release and lift using thin palet knife and place onto front of car, attaching it with a little edible glue/royal icing. VOILA!
Labels:
black,
fondant,
front,
grill,
lights,
logo,
maroon,
Mercedes Benz E-class Cake,
mud cake,
number plate,
orange,
rear,
royal icing,
side,
silver,
tires,
white,
white chocolate ganache,
windows
Friday, 8 February 2013
'The collection': shoes and handbag cupcakes
The Collection
@Butterfly Cakes Bradford
These cupcakes are a real favourate of mine. It was my first attempt at shoes and handbags of which I am really proud! They were designed and made by hand without the use of cutters or stencils. I loved designing each topper, even though it took me absolutely hours! It was truly a labour of love. After all, which girl would not like to create her very own collection of bespoke accessories?
Monday, 14 January 2013
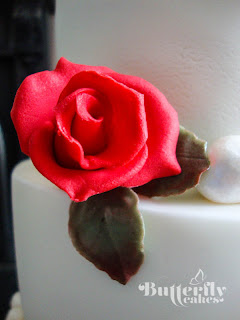
Red Rose and Pearl Three Tier Wedding Cake
Last week I was busy making a tiered wedding cake. So I began by baking my six, eight and ten inch round vanilla sponge cakes. I then layered each of them with strawberry jam and two layers of vanilla bean buttercream and covered them in fondant.....
I then stacked the cakes and added my pre-made fondant rose and leaf embellishments....
I also added my pre-made fondant pearls......
As a final 'Butterfly Cakes' touch I added my signature pearlised hand-made fondant butterfly.....
Labels:
butterflycakes bradford.,
edible,
fondant,
ivory,
Red Rose and Pearl Three Tier Wedding Cake,
strawberry filling,
vanilla buttercream,
victoria sponge
Subscribe to:
Posts (Atom)


.jpg)
.jpg)


.jpg)

.jpg)


